Crock Pot Tater Tot Casserole

Have you ever had one of those days when you aren’t sure how you are going to get home after a crazy day of work/kids/carpool/life and make something your family will eat?  While I have kids who will eat about anything, there are plenty of nights I wonder how I’m going to feed my family before they have to be asleep!

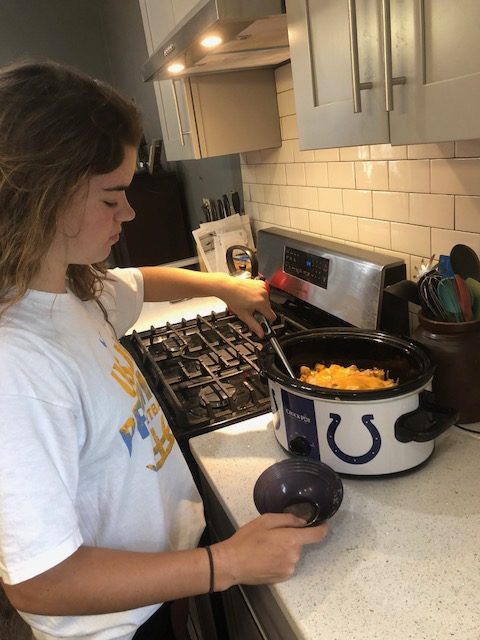
I have the perfect meal for you!  And in this case, I didn’t even make it!  My 14 year old daughter had supper prepared for the family while I was trying to get home after a crazy day of work.

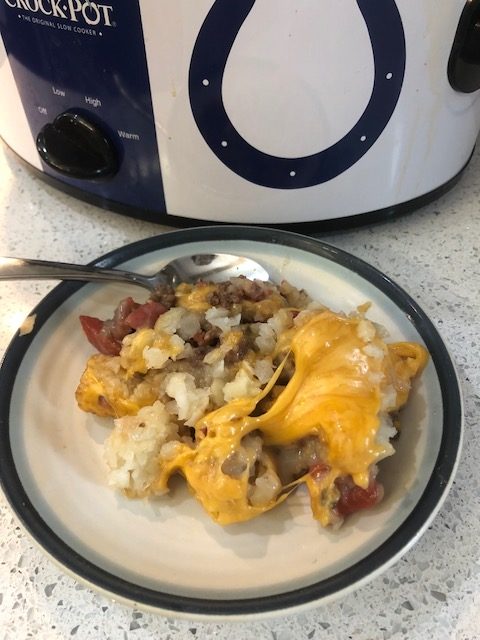
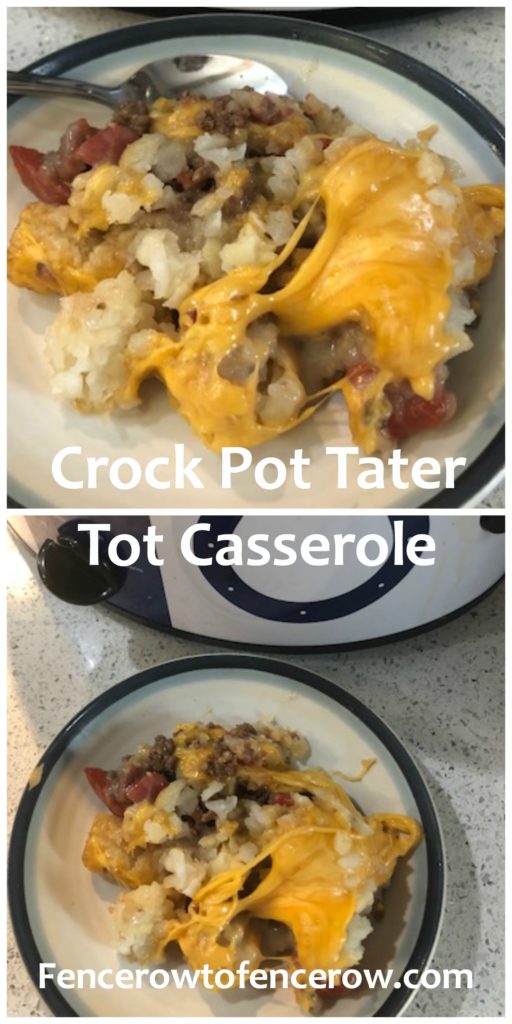
Enter Crock Pot Tater Tot Casserole.  It may not be a gourmet meal.  Or maybe it reminds you of your college days when you couldn’t afford to buy expensive groceries, but it’s a meal everyone in your family will eat!  It’s also a meal you could make on a nice fall afternoon, while watching your favorite family member play youth football, run a giant cross country meet that takes all day, or plays in a volleyball tournament that last for hours!  Tailgating isn’t just done at college sports, it’s at plenty of youth events as well!

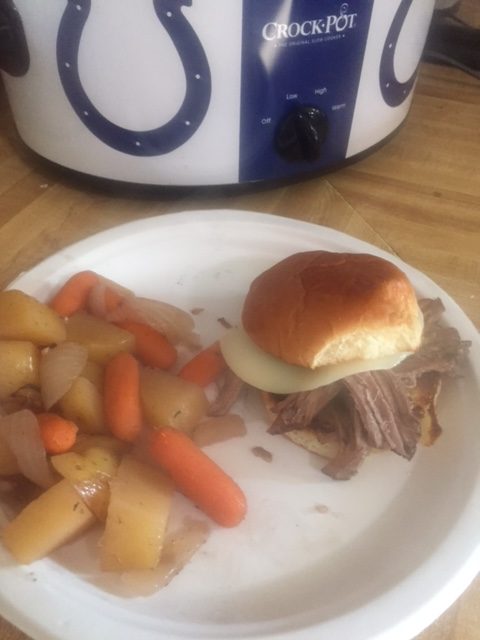
Alexandra was thrilled to make this completely on her own.  In fact, I was still at work when I called her, rattled off the recipe, and she assembled it in my favorite Colts Crock Pot.  By the time the kids got done with their cross country and football practices, supper was done and I didn’t lift a finger.  Thank goodness for kids who jump in and help!


Crock Pot Tater Tot Casserole
Author: 
Prep time: 
Cook time: 
Total time: 
 
Ingredients
  • 1½ lbs ground beef
  • 32 oz bag frozen tater tots
  • ½ cup chopped white onion
  • 10 oz can diced tomatoes
  • 10 oz can cream of mushroom soup
  • 3 cups shredded cheddar cheese
Instructions
  1. Brown the ground beef and drain well. Or place the beef on a paper towel-lined plate and pat to absorb extra grease.
  2. Place half the tater tots into the bottom of a Crock Pot that you have sprayed with nonstick spray.
  3. Spread the ground beef over the tater tots
  4. Pour the tomatoes over the ground beef
  5. Spread the cream of mushroom soup over the tomatoes
  6. Spread the remaining tater tots over the soup
  7. Cover and cook on low for 5 hours or high for 3 hours.
  8. In the last half hour of cooking, spread the shredded cheese over the entire top layer of tater tots.
  9. Replace lid and continue to cook until cheese has melted.


This meal reminds me so much of something my roommates and I ate in college!  Brings back fun memories!

This fall, when my Farmer is in the field during long hours of corn and soybean harvest, this is one easy meal I can take to him or quickly feed my kids.  What’s your favorite meal to take to your kids sporting events?  I’d love to hear about it!

Instant Pot Broccoli Ham Cheddar Soup

Broccoli and Cheddar Soup is one of my favorite soups of all time.  It’s full of yummy cheesy goodness that I love but I feel like I’m eating a bit better since there is broccoli in there too!  With Easter on the horizon, and ham on our Easter menu, I’m already thinking about how to use the leftover ham we will have.

As a 4th generation hog farmer, ham is always on our families Easter menu.  And there is great selection at my grocery store.  Ham is a great buy around Easter.  I like to buy a spiral sliced ham.  I usually don’t use the sauce packet that is included.  I like to make my own sauce to baste the ham!

In this case, the leftover ham is going in my Broccoli Ham Cheddar Soup being made in my Instant Pot!

If you’ve seen my last few recipes, it’s all been Instant Pot creations!  And they are filling soups, comfort food, and better than anything I can buy in a restaurant.

How does your family use leftover Easter ham?  Try this soup and let me know what you think!


Instant Pot Broccoli Ham Cheddar Soup
Author: 
Cuisine: Soup
Prep time: 
Cook time: 
Total time: 
Serves: 10 servings
 
An easy, comforting soup that can be made in minutes!
Ingredients
  • 2 pounds fresh broccoli, chopped
  • 1 pound ham, chopped
  • 8 oz cheddar cheese
  • 1 small onion chopped
  • 4 cups chicken broth
  • 2 cups milk or heavy cream
  • 1 cup shredded carrots
  • 2 tbs hot sauce (optional)
Instructions
  1. Place chopped broccoli, ham, onion, chicken broth and carrots in the Instant Pot.
  2. Place on Manual high pressure for 15 minutes. Make sure the valve is turned to sealed.
  3. Do a quick release and stir in milk or heavy cream.
  4. Place pot back on saute until for about 5 minutes. Do not bring to boil
  5. Stir in cheese until melted. Add hot sauce as desired.


Instant Pot Yogurt

We eat a ton of yogurt in our house.  My kids favorite has M&M’s or Oreo’s that are in the lid and can be sprinkled over the top.  I’m not convinced that’s the best breakfast for them in the morning!  And they are expensive!  Those little cups of yogurt masquerading as dessert cost over $4!  As the proud owner of an Instant Pot and having seen a ton of yogurt recipes, I decided it was time to give yogurt a try!


There doesn’t seem to be a ton of ways to make yogurt in a pressure cooker or Instant Pot.  I drew inspiration from This Old Gal’s recipe.  She seems to have alot of options!

I started with Fairlife milk.  Have you tried their milk?  If not, you should buy some!  Their chocolate milk is fantastic!  Fairlife is made from cows at Fair Oaks Farms in Northwest Indiana. This agritourism destination is a favorite of my family and a personal interest of mine.  Fair Oaks has a dairy adventure, where guests can tour a real working dairy farm.  We love watching the cows be milked!  But I’m also really excited about the Fair Oaks Pig Adventure!  I serve on the Board of Directors for the Pig Adventure and love to encourage people to visit and see baby pigs, learn about pig health, and even give a pig an ultrasound!  (It’s a plastic pig, but it’s still fun to learn about pig pregnancies!)  Visitors get a chance to visit a working pig farm, and leave without ever getting their shoes dirty!

Every yogurt recipe I read called for ultra pasturized milk.  What does ultra pasturized mean? Ultra Pasteurization (UP), or Ultra High Temperature (UHT) pasteurization, is the process of heating milk to approximately 280 °F for just 2 seconds and then chilling it back down rapidly. This gives it a longer shelf life!

I used Fairlife Ultra Pasturized Whole Milk for this recipe.  A half-gallon was $3.99.  I also needed a yogurt with active cultures.  I bought a 5 ounce container of plain Chobani yogurt and used half of it.  That only cost me $1!  My yogurt only cost me $5!

The process was simple.  Put the half-gallon of milk in the Instant Pot pan.  Add a few tablespoons (or in my case, a couple of spoonfuls) of the yogurt and whisk.  Set the Instant Pot to Yogurt, making sure your valve is closed, and cook for 8 hours!  That’s it!  The pot doesn’t come up to pressure.  So the lid can be removed at any time.  The longer you cook the yogurt, the tangier it gets.  You could cook it for 10 hours and have a tangy yogurt.  I opted for 8 hours so it would have a bit less tang.

After 8 hours, put in the fridge and let cool for at least 4 hours.  And then doctor it up however you want!  I added vanilla and honey to sweeten my yogurt a bit.  The kids love to eat yogurt with fruit and granola.  I love Kind granola.  I don’t care that they promote organic ingredients.  That’s not important to me.  I just love the taste and the price!


A half gallon of milk makes a lot of yogurt!  I will have at least 16 1/2 cup servings of yogurt from this recipe.  I estimate I will save at least $8 by making my own.  The kids can add their own toppings.  I may even take some of my savings and let them add a few M&M’s.


5.0 from 1 reviews
Instant Pot Yogurt
Author: 
Recipe type: Instant Pot Yogurt Cold Start
Prep time: 
Cook time: 
Total time: 
Serves: 16½ cups
 
A super simple, cost effective way to make your own yogurt!
Ingredients
  • ½ gallon ultra-pasturized milk. I use Fairlife Whole Milk
  • 2 tbsp. yogurt with active cultures
Instructions
  1. Add milk and yogurt to Instant Pot. Whisk together and put lid on.
  2. Push the yogurt button and use the +/- buttons and set time to 8 hours. The Instant Pot will start at 0 and count up to 8 hours.
  3. When Yogurt cycle is finished, remove cooking pot and transfer to refrigerator to chill for at least 4 hours.


Instant Pot Ham and Bean Soup

Ham and bean soup is one of my families favorite recipes to enjoy year round.  I’ve always made ham and bean soup in the Crockpot, but now do it in my Instant Pot.  When you make it in the Instant Pot soup tastes like it cooked all day!

I love soup.  No matter what the weather, I could eat soup.  Remember my trip to Mexico where I discovered I love Pork Pozole Soup?  I had to go home and make it immediately!  Maybe you like chili?  My Mexican Crockpot Chili is a family favorite!

Ham and Bean Soup should be eaten with cornbread!  I rarely make from scratch cornbread.  This soup was enjoyed with a box of Jiffy Mix cornbread!

I love my Instant Pot.  I have an Instant Pot Duo80 8 quart pot.  It is a great time saver for busy families or nights you get home late and need to get a meal cooked quickly!

This soup is so easy.  There is very little prep involved.  And it will make your kitchen smell so good!

Do you have a favorite Instant Pot recipe?  Let me know what it is!  And give this simply Ham and Bean Soup a try.  You’ll love this soup!  And you’ll have leftovers for the next day!


Instant Pot Ham and Bean Soup
Author: 
Recipe type: Soup
Prep time: 
Cook time: 
Total time: 
Serves: 8-10 servings
 
A comfortable, filling, easy soup that your whole family will love!
Ingredients
  • Ingredients
  • 1 20-ounce pack Hurst 15 bean soup, rinsed. Spice packet will not be used
  • 1 chopped onion
  • 2 cloves minced garlic
  • 3 bay leaves
  • 2 teaspoons dried thyme
  • 8 cups chicken broth
  • 1-2 teaspoons hot sauce, can add more if desired
  • 1 lb diced ham - add more if you desire a chunkier soup
Instructions
  1. Place all ingredients in your Instant Pot or electric pressure cooker.
  2. Cook on high manual pressure for 40 minutes.
  3. Let the Instant Pot do a natural release.
  4. Season with salt, pepper and extra hot sauce to taste.


Disclaimer – The article contains affiliate links.  Should you want to support our farm life, please click the links! 

Jeanette


The Best Mexican Pork Pozole Soup

I just made the best soup of my entire life.  Seriously people.  I almost ate three bowls of this fantastic yumminess!  Mexican Pork Pozole Soup that is hearty, easy and so, so delicious!

Let me back up and explain why I wanted to make this soup.  A few weeks ago, Rusty and I had the chance to go to Mexico.  We’ve been to the sun and sand of our southern neighbors on a few occassions.  But anytime we get to sit on a beach as a couple is a great time!  With a farm full of livestock, it is nearly impossible to get away.  The animals need cared for 24 hours a day.  If we just had crops, it would be easier to escape for a few days.  But with hogs, it takes a bit of planning to be gone.  Thankfully, we have great employees who tend to the animals when we are gone!

And thank goodness we could escape for a few days.  We needed it!  21 years of marriage and we still make each other laugh.  I’m fairly certain he was goosing my rearend as we were trying to take this picture!

See my sunburnt nose?  See my handsome hubby?  I love him so!

The best food we ate was this just caught, grilled on the beach, giant yellow tuna!  Served with freshly cracked coconuts!  Coconut water isn’t exactly tasty, in my opinion, until you add some flavored vodka to it.  Then it starts to taste better!  And I should be embarrassed that I attacked that coconut with my plastic knife and fork to get the meat out of the inside!  It was so tasty!

This was so good.  I wish I could lick the computer screen!  I ate this meal sitting on my beach chair, watching Rusty play beach volleyball, visiting with great friends and enjoying the ocean in front of me.  It was heaven!

I love to eat as “local” as possible when travelling.  Sometimes resort/hotel food doesn’t quite fit that bill.  When I’ve been in Mexico, I sometimes find they tone down the spices, “Americanize” the flavors and serve too many burgers!  So I was very excited to find a soup at breakfast one morning.

I loved this soup.  Pork Pozole Soup with hominy and pulled pork.  The broth was fairly mild.  I ate two bowls for breakfast that morning, and each subsequent day we were there!  And I wanted to recreate it when we got home.

I made my soup a bit spicier.  I like a little heat.  My kids like some spice as well.  And my Farmer thinks jalapeno’s are mild.  So spice doesn’t bother him!

The first step was to chop up an onion and brown it in some olive oil with garlic.  I rarely crush garlic cloves.  I always have garlic paste on hand.  And this one I found on clearance!  A little squeeze of this goes a long way.

After browning the garlic and onion, I added the spices for a few minutes.  Be sure to stir so it doesn’t burn.

I made this recipe with both a pork loin and a pork shoulder roast.  Despite having both of these items in the freezer from when we butchered over Christmas, I did purchase them at the grocery.  I recommend buying whichever cut is on sale.  This picture is of a pork loin.  I cooked, submerged in water, on medium for 8 hours in my crockpot.  The water becomes my pork stock for the soup.

Add the pork stock, hominy and enchilada sauce to the onion mix.  Bring to a boil.  Then add the shredded pork and heat until warm.

Serve with sour cream, a squeeze of fresh lime juice and salt and pepper to taste.

I liked this soup so much, that I just made my Farmwife friends their own soup!  Eight of us just got together and did a big freezer cooking session.  I made 8 batches of this soup, one for each of us, and froze them in gallon size freezer bags.  All my friends will have to do it thaw it, heat in a crockpot until warm, and serve!  My friend Cheri, who blogs at Queen of Free, has a great post about how to do a successful freezer meal day.

I hope you love this!  I miss this view, but so glad I brought the soup idea home with me!


The Best Mexican Pork Pozole Soup
Author: 
Prep time: 
Cook time: 
Total time: 
Serves: 10 servings
 
Ingredients
  • 1 tbsp olive oil
  • 1 chopped onio
  • t tsp garlic paste
  • 2 tsp dried oregano
  • 1½ tsp dried cumin
  • Pork stock from cooked pork loin or roast
  • 1 large can white hominy
  • 28 oz. mild enchilada sauce
  • 3 cups pork roast cooked and shredded
  • 1 lime
Instructions
  1. Cook your pork loin or roast in a crockpot for 8 hours on medium. Remove pork and shred. Save stock.
  2. Add the olive oil to a large pot. Saute the onion and garlic paste for 5 minutes on medium heat. Turn the heat to low and add the spices. Saute 1-2 minutes, continue stirring.
  3. Add the pork stock, hominy, and enchilada sauce. Return heat to medium and bring soup to a boil.
  4. Reduce the heat to low and add the shredded pork. Simmer for 15 minutes until hot.
  5. Serve with sour cream and lime wedge.

“This post was sponsored by Indiana’s Family of Farmers but all thoughts and opinions are my own”


Instant Pot Chicken Tzatziki Bowls

I finally joined the rest of the world and purchased an Instant Pot. I purchased mine on Black Friday and took nearly 2 months to get it out of the box! I wasn’t sure what to do with it. I remember my Mom pressure cooking a lot of meat when we were kids. But I love my Crock Pots and wasn’t ready to replace the three I have!

I finally broke the Instant Pot out of the box and did the hard-boiled egg test. I was impressed with how easy they were to peel when they were cooked. But after getting those done, I knew it was time to tackle a real meal.  This link takes you to the Instant Pot I bought.  I found it on a great sale!

Since I’m trying to take my lunch to work a bit more, I decided chicken and rice bowls would be easy to prep for the week.

I have a bunch of brown rice in my pantry right now. I bought some on sale and it’s just taking up space! Chicken and rice bowls seemed easy to make and a way to use the rice.

This turned out so well! I am so impressed with my pressure cooker.  To start, I simply put 5 raw (not frozen) chicken breasts in the pan, placed 4 cups of chicken broth, chopped garlic, oregano and basil and put the lid on. I set the pot on high pressure for 15 minutes. When the cooker was done, I moved the knob to vent and did a quick pressure release. When I took out my chicken breasts, they were perfectly cooked! All I had to do was shred the chicken and that was done!

The sauce was super simple. A quick mix of greek yogurt, dill, garlic and lemon juice was all the sauce needed to taste great. I cooked instant brown rice in the microwave, added shredded chicken, chopped tomatoes and cucumber and added a dollop of the tzatziki sauce. I divided the mixture between five bowls and ate it for lunch all week! Well, my husband ate one of them and thought it was really good!

If you don’t own a pressure cooker or Instapot, I highly encourage you to buy one!  I think you’ll love using it!


Instapot Chicken Tzatziki Bowls
Author: 
Prep time: 
Cook time: 
Total time: 
Serves: 5 bowls
 
A quick, healthy meal to prep for a busy week!
Ingredients
  • Chicken
  • 5 boneless, skinless chicken breasts
  • 3 Tbs garlic, minced
  • 4 cups chicken broth
  • 1 Tbs dried oregano
  • Tzatziki Sauce
  • 1 cup plain Greek yogurt
  • 1 TBSP fresh dill, chopped
  • 1 garlic clove, chopped
  • Other ingredients
  • 2 chopped cucumbers
  • fresh lemon juice
  • Instant brown rice, cooked
  • Chopped grape tomatoes, red, yellow or orange
Instructions
  1. Place the chicken breasts in your InstaPot bowl. Add chicken broth, garlic and oregano. Seal pressure cooker. Set on high pressure for 15 minutes on high pressure and the meat setting. Make sure your valve is set to seal. When cooking time is done, move valve to vent for a quick pressure release. Shred chicken.
  2. Mix tzatziki sauce in a bowl. Cook brown rice, chop cucumbers and tomatoes and divide all ingredients into individual bowls.


Campfire Elephant Ears

I am so glad fall has arrived in my cornfield.  The trees are beautiful, the fields are being harvested, and our pace is a little more relaxed around the farmhouse.  The kids are in-between school sports, just doing some travel basketball right now.  There is time for crafts, kicking a soccer ball in the yard, competitive games of Uno and Monopoly, rides in the combine and just enjoying each other.

I was able to take a week off of work during the kids Fall Break.  The Farmer was busy with harvest, so he wasn’t as lucky to hang out with us.  Instead, I spent the week with great friends and their kids at a local state park campground.  The kids rode their bikes, decorated pumpkins, painted rocks and sticks, and just goofed off.  The grownups enjoyed adult conversations, a few adult beverages and a lot of food!!

img_3362

We also got to trick or treat.  For an easy costume idea, I recommend going as Smores!  I donned the graham cracker costume, simply cardboard front and back.  Lauryn was the Hershey Bar and Levi was a marshmallow!  Alexandra didn’t want to play along with our family-theme so she went as a Holy Cow!  We simply decorate white pants and shirt with black spots and added angel wings and a halo.  She looked so cute!

img_3332

I love Elephant Ears.  For those not from the Midwest, they are also called Mouse Ears, funnel cakes, beaver tails and funnel clouds.  In the midwest, these are popular at county fairs and local festivals.  They are basically dough fried in oil, brushed with butter and then dipped in cinnamon sugar.  And they are delicious!

Since we were camping and doing much of our food over the firepit, I decided to try my own campfire version of elephant ears.  I didn’t have a recipe and had no idea if this would work.  However, based on how fast they were consumed by the kids and their friends and the adults, I think they were a hit!

All I did for these Campfire Elephant Ears was to buy 3 cans of canned biscuits.  I placed a cast iron skillet over the firepit.  The fire was pretty hot, but the flames weren’t high above the skillet.  I poured about 2 inches of oil in the pan.  I have no idea how many cups this was.  Just enough to give room for the dough to cook.

Then you’ll need to find extra kids to help flatten the biscuits.  This was easy as we had kids in and out of our campsite all week.  So the kids were put to work, by lantern light, trying to flatten and stretch the dough.  I learned, after ruining the first one I cooked, that it’s important the dough be thin!  Otherwise you will have a burnt outside and a doughy, raw inside.

img_3380

Once the dough is thin and your oil is boiling, carefully put the dough in the oil.  Use tongs to turn it and cook on the other side.  There is no real timing method to this.  It is fast!  I kept turning it over and over until I decided both sides were brown.  It maybe took 90 seconds to 2 minutes per elephant ear.

Once you take it out of the oil, blot with paper towel and add the cinnamon sugar.  I didn’t use butter, but you could brush it with butter then add the sugar topping.

img_3382

That’s it!  These are so good!  If you are used to the giant treats at your county fair, these aren’t going to be exactly the same.  But if you are camping with an open fire, friends, your kids and some dance music in the background, you’ll love these and the memories that come along with making them!

Have you ever made a treat over the fire?  I’d love to hear about it.  We love camping and finding new things to cook over the fire.  And most importantly, making memories that we hope last a lifetime!

elephant-ear

Campfire Elephant Ears


For this recipe, I used a cast iron skillet much like this one.  I love the Lodge brand for newer cast iron.  I have a bunch of old cast iron but I buy Lodge when I need new items too!

I am hooked up with some of my favorite bloggers this week!  Check out Meal Plan Monday for recipe inspirations!

Jeanette2brownsmall

Quick and Easy Cheesy Beef Sandwiches

I love a quick meal during our fall harvest season.  My Farmer is in the midst of corn and soybean harvest.  And my kids are all in between basketball practice, FFA and 4H meetings, cattle and rabbit chores, potty training a new puppy and quickly nearing Thanksgiving!  We are chasing our tails around our cornfields.

Because we recently had a beef butchered, I have an entire brisket that I needed to use.  The brisket is the part of the cow above it’s front legs.  What I would call it’s chest.  Brisket is a tough cut of meat.  It is what is used to make corned beef or pastrami.  And to make it taste really good, I think it needs smoked for a long time or submerged in brother and slow cooked all day!

Usually, I would smoke a brisket.  But we didn’t get it done over Labor Day during our camping outing with friends, so I needed another use for the hunk of meat.  8 hours submerged in the crockpot was all this meat needed to be pull-apart tender and a delicious base for this sandwich!

Yes, these are paper plates.  And probably the worst food pictures I’ve ever taken.  The whole family was eating outside and I don’t use fancy plates when we are on the run!

Many thanks to Indiana’s Family of Farmers for my new Crock-Pot Indianapolis Colts NFL Cook & Carry Slow Cooker with Bonus 16-ounce Little Dipper Food Warmer!  This CrockPot features a cook and carry inside dish and I love it!

img_3227


img_3230


Quick and Easy Cheesy Beef Sandwiches

Quick and Easy Cheesy Beef Sandwiches

Quick and Easy Cheesy Beef Sandwiches
Author: 
Recipe type: Dinner
Prep time: 
Cook time: 
Total time: 
Serves: 12 sandwiches
 
Let your brisket cook all day and dinner will be quickly assembled!
Ingredients
  • 3 Tablespoons olive oil
  • 3-5 lbs. beef brisket
  • salt and pepper for seasoning
  • 1 sliced onion
  • 5 chopped potatoes
  • 1 bag of mini carrots
  • 4 garlic cloves, minced
  • 2 teaspoons dried rosemary
  • 3 bay leaves
  • 1 cup dry red wine (great way to use leftover wine)
  • 6 cups beef broth
  • enough water to cover brisket
Instructions
  1. Add oil to a large skillet and heat over medium heat. Season the brisket with salt and pepper on all sides. Cook the brisket until browned on all sides, about 3-4 minutes per side.
  2. Put the onion, carrots and potatoes in the bottom of the slow cooker. Add brisket on top of the vegetables. Add garlic cloves, rosemary and bay leaves. Add the wine, broth then fill with enough water to cover all of the beef and vegetables.
  3. Cook on low for 8 hours, then high for an additional hour. Remove the bay leaves before serving.
  4. Sandwiches
  5. Remove the brisket and shred. Butter both sides of the buns then place them under the broiler on low for 1-2 minutes. Be care not to burn! Place shredded brisket on one side of the bun and top with cheese. Return that half back under the broiler for another 1-2 minutes until cheese is melted. Top with the other half of the sandwich bun. Use remaining broth from the slow cooker as a dip for the sandwiches. Serve cooked potatoes, carrots and onions alongside.


Whatcha Crockin Logo

I’m linked up to Whatcha Crockin!  Check out their website for more yummy recipe ideas!


And check out my blog idol, Southern Plate, for her recipe ideas this week!  I’m linking to her Meal Plan Monday – #34 This week.

Easy, Crockpot Beef Stuffed Peppers

Are you ever grocery shopping and find produce on clearance and buy all of it?  I do!

A few months ago, I found a 3-pack of red, orange and yellow peppers on sale at my local grocery store.  I love peppers.  But they can be expensive!  So when I found these three peppers for $2 on clearance, I bought all the marked-down peppers!

After bringing all of those peppers home, I needed recipe inspiration for them.  I have always loved eating stuffed peppers in restaurants, but hadn’t made them at home.  So a quick recipe book search and some of my own changes let me to make Easy Crockpot Beef Stuffed Peppers!

Don’t be intimated by thinking these may be hard to make.  They are so easy and SO delicious!  Since we are hog farmers and often have more ground pork in the freezer than ground beef, I also make these with ground pork and think they are just as good!

PicMonkey Collage

Easy, Crockpot Beef Stuffed Peppers

crockpot peppers

Stuffed pepper

5.0 from 2 reviews
Easy, Crockpot Beef Stuffed Peppers
Author: 
 
A simple, easy dinner that your family will love!
Ingredients
  • 6 bell peppers
  • 1 pound ground beef or ground pork, cooked thoroughly
  • 1½ cups cooked brown rice (I used boil in a bag microwave brown rice)
  • 2 cups shredded cheddar cheese
  • 1 can black or pinto beans, drained and rinsed
  • 1 can of corn
  • 8 ounces salsa (or more to your taste)
  • Avocado, salsa, sour cream, cheese for additional toppings
Instructions
  1. Cut tops off of bell peppers. Remove the seeds.
  2. Spray your crockpot with cooking spray.
  3. Cook your ground beef or pork. Mix with the brown rice, beans, corn, 1 cup of cheese and salsa.
  4. Spoon the mixture into the peppers
  5. Put peppers in crockpot and cook on low for 4-5 hours or on high for 2 hours
  6. Sprinkle the remaining 1 cup of cheese on the peppers during the last 15 minutes of cooking.
  7. Serve with salsa, chopped avocado, sour cream or any other topping you prefer!
Nutrition Information
Serving size: 1 pepper


Let me know how you and your family like them!  I’ll be eating them again soon as well!

Whatcha Crockin’ Wednesday

The Road that Needs Traveled

On July 27, 2015, I lost my Grandpa.  And I spent the next month eating my way through the sorrow.  It was almost a month later, in late August, when I stepped on the scale and nearly had a panic attack with the number that faced me.  I had never been that heavy in my entire life.  Not even when I was pregnant.  I knew changes had to be made.

So I started a 100 days in a row journey.  I made a goal to work out everyday for 100 days.  And I did it.  It wasn’t easy.  Some days workouts were miserable.  Some were great.  Most were just days I was happy to be moving.

In the process of working out that much, I lost 37 pounds.  I felt so much better and was starting to find my waistline again.  But when the 100 days of working out were done, I quit.  And I ate ice cream.  And drank more wine.  And switched jobs.  And found out my 9-year-old is dyslexic.  And had a pretty bad crop harvest.  And the list could go on and on.

All to say I gained some weight back.  And I’m sitting here feeling miserable and like I failed yet again.  I seem to be able to lose weight. I just can’t stick with any plan.

I’ve struggled in the past few months with my self-esteem.  It has tanked.  I have caught myself saying stuff about my butt and thighs in front of my 12 and 9-year-old daughters.  And they are the last people I need to negatively influence about weight.  I have the best professional image, but my own personal self-worth is just bad.

So what changes this time?  I really don’t know.  I need to drop the “all-in/out” mindset.  I need to have a workout plan that just gets me moving a little each day.  I need to eat better.  And I need to believe in myself.

IMG_2492

After work tonight, I laced up my shoes and headed to my path.  I’ve sought this path as my exercise route and a good place to do some thinking and planning.  I’m not sure I came up with any great ideas but I did promise myself to work on my self-esteem.  To not worry about what people think of me.  To quit talking negatively about myself in front of my daughters.  To smile more.  To be happy.  And to be consistent, but not expect perfection.